First things first I'd really like to thank everyone who's helped my blog reach 200 views I feel so happy! YAY! But anyway on with the show!
Okay so I was gonna write about those fish that eat your feet (because they are amaaaazing!) BUT after my last post about what I wore for non-uniform day I've had a fair few requests of people especially Eve and Rakhi asking how I did my hair!!! So who am I to not offer the people what they want hee hee! So here's how you get a kinda princessy glamorous thick lush hair look that simply is fantastical!!! You'll need a few items first!!!
-----------
Bobby Pins
Hairspray - Now personally I have always used Pantennet Pro-V Ice Shine, although I know Roisin will reccomend using the super strong Tresemme one. Basically it's a matter of personal preference but whatever brand you use make sure you get super strong hold, none of this light and airy stuff!
A Bobble/Separating Clips (again it's all about personal preference I stick to a good old hair bobble)
Large Curling Tong (you're looking for one that's preferably between 32 and 36 mm oh and also ceramic!)
Hair Extensions - As to hair extensions this really does depend on your hair length and the kind of look you're going for. To give you a rough idea my hair is 20 inches long and I feel that I need the hair extensions in order to get length when curling so that you can get that thick princess look, but if you're happy with having your curls look short, or you have super long hair there's no need
Hair Brush
You may also need Ratting or a Bump It if you want super height without back combing your hair!
--------
So to start off with obviously your hair needs a good brushing through. I would recomend with this hairstyle that it looks and stays best if you do it in the middle of your hair washing cycle, if your hair is too clean (so like if you did it the same day/day after you washed it) your hair might be too slippery and the curls will drop out, but obviously if you leave it too long your hair will be greasy so won't look good at all! Basically you've got to judge and know how your hair best reacts to curling and stuff!

So after brushing you'll need to separate your hair, this is where your bobble or separating clips come in use, for your first layer you don't want much at all as it will be covered up by the extensions, but at the same time you need enough for them to grip onto so I reckon about an inch to an inch and a half is about the right ammount, then put the rest of your hair up on top of your head
Then your gonna start working onyour hair section by section, for such a thin layer you really only need to curl 4 sections, but for thicker hair you may need 5 or 6 and thinner you may only need 3! So get your section in one hand and then roll it up on your curling tong!
 Now I know some people prefer diferent types of curling tongs, some people like those ones that are just a wand, me personally I prefer the ones that can grip the hair, now to achieve the curl you see below I hold the tongs horizontal with the clasp-ey part on top and the barrel beneath, now rolling up from the bottom of my hair I roll inwards so when it's fully rolled on the outside is my hair then the barrel then my chin. Hold for about 10/15 seconds for a medium heat curler, 5 for a high heat. IF your hair really doesn't like curling you can hair spray your hair before you curl it then it definitely will stick! Release and your left with a gorgeous curl!
Now remember to hairspray once you've done it!!!! Hairspray either after every curl before you separate it, or every layer if you only start separating after you've done the whole layer,but remember HAIRSPRAY HAIRSPRAY HAIRSPRAY!!! I cannot emphasise enough!

So take your curl and separate it from something that's an inch and a half thick to lots of little super thin curls, it's gonna look kind of bad at first but trust me this is what will build up all that thick volume you want for at the end and gives it a less victorian ringlets look (unless of course that's the look you're going for). So you'll be repeating this part all the time your curling with this constant separation so you're gonna have to be patient!

Here's what it looks like when one ringlet is separated, not too impressive but you'll just have to wait to see the effect it gives hee hee! Well after you've done this don't forget to HAIRSPRAY now you've separated!

So you carry on with that until you've finished your entire bottom layer! Now if you wanna add extensions now's the time! So here I am and mine are all layed out. As you can see I've precurled mine. This is mainly because as mine are plastic they're a nightmare to curl and so I need to hold them out in front of me, but if you can curl yours easily you can clip them in then curl them

Well as you can see this doesn't really look too promising because you can see all the clips and also it looks very fake, but don't worry once you get everything else layered on top so long as they're the right colour they'll blend straight in - trust me! But you can certainly see the length they add If you need extensions to add volume you can of course add in more layers, but this way of styling, separating all the layers should add enough volume without having to do that!
 Okay so in the picture below I have basically repeated what I did for that first layer before I put the extensions in, as you can see once you've put that layer on top then separated it all out it blends in straight away and now you've got the length as well as the volume you can really see how this style is gonna end up, don't forget once you've done the layer after the extensions HAIRSPRAY!
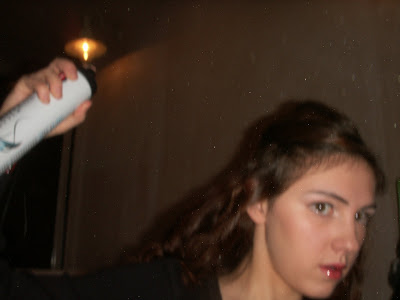
Hee hee and here you can see me emphasising that point as I'm spraying it myself here we've still got a couple more layer of hair to go I think though!

Right before you do your second to penultimate layer you're gonna have to make sure your parting is in the right place, if you already have a fringe or side fringe then you don't need to bother with this step, but for us girls who don't you're gonna need to create the image of a side fringe to do that, to do that you're gonna have to make sure you have a parting really far over on your head, so although I normally have a parting lined up with the inner corner of my eye, for this style i'm moving it over to be in line with the outer corner of my eye. Obviously it doesn't matter which side you do this on so long as you do it!
 So once you've done that second to penultimate layer your hair should really have built up now to a great mass of curls like below, don't forget to HAIRSPRAY!
Right so now we've reached the penultimate layer! So curl everything as normal right up to the scallp, apart from when you reach the part of your hair that's going to act as your fringe, for the penultimate layer you're gonna want to leave the last 2 inches of that front section un curled like show, and also you don't wanna separate this curl so when your spraying everything else after separating them, spray this unseparated!

On your last layer repeat the stage above precisley except for leave about 4 inches insted of 2!
 Okay so here we are and we have some thick vixen looking locks! Aren't they gorgeous, if you're just going for some glamorous sultry curls you can of course leave it here, but we're going for a princess look so give it one last quick spray before we move on to creating the fringe and bouffant!
 So for your fringe you're gonna collect up that section that you left uncurled before, it should be about 1 inch back from your headfore and about 4 inches across, then clip it out of the way either with separating clips or you can use a bobby pin! Not a bobble!
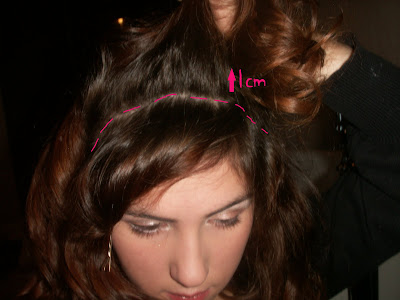
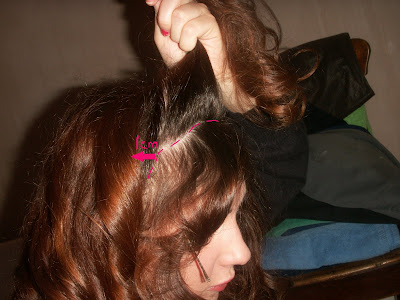
Now this next layer that you collect is gonna be the smooth part you just gently place ontop of your backcombing, ratting, or bump it, and is gonna make your bouffant do look tidy and fabulous! You'll need to get a section that runs from ear to ear, you can see that with the dashed line i've drawn, as well you probably want it to be a centimetre to an inch thick, this difference all depends on the thickness of your hair, a person with thick hair will only need a centimetre, someone with thin hair will probably need an inch! Once you've done this section it off!

Here's this same picture from the side just to demonstrate, so section it off with a bobby pin, and then leave it hang whilst we deal with creating the height!

So here we creating the height for your bouffant, as you'll see on thefinal pictures of this post mine actually isn't that high, that's because I'm trying to grow my hair and so backcombing will not do it any good, so unless I'm going out for a special occasion I try and avoid it and so this time I haven't backcombed although I did for non-uniform day. But when I did back comb I got a circular section from just behind the last section we collected and started back combing until it was all done and stuck up straight then I hairsprayed, the higher you want your bouffant the more you should backcomb though, you can if you want do the whole section for a super high one! However if you're growing your hair like me, you're probably gonna want to avoid that, so there are some options. Instead of collecting this section you can instead put behind the last section a piece of ratting or a bump it. For those that don't know what ratting is it's basically all that hair you've pulled out of your hair brush collected together, sounds kinda grosse but it was one way they got those huuuuge beehives in days gone by, a second more modern alternative is the bumpit those little plastic alice band things that you just put in. So with ratting you'd just pin it in to place, and a bump it should just slide straight in.

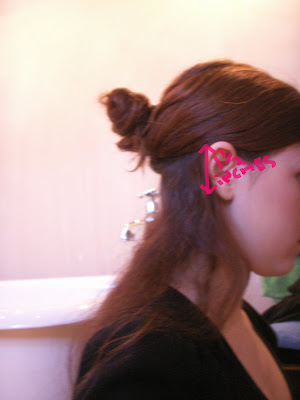
After this you simply get that middle section of hair you pinned out of the way and gentley brush it over the top and pin in place with a couple of pins before adding a heck of a lot and I mean a heck of a lot of hair spray!!!!! Here I've used loads because I have no ratting, no back combing, and no bump it, so I'm relying purely on the pins and the hair spray, but as you can see it can work without all that although it won't be very high. Butyes just gently brush that section over the top and from here you can adjust the shape of your bouffant! For a more stylised look you can have it suddenly go up over the top, or for a more natural look like below you can do some the hair gently to the side so the bouffant gains gradual height as apposed to sudden, it's all about preference! Then you take that first section you separated brush it over to one side of your face and pin it down, sprayand VOILA! Hee hee you're done!

So here's the back of the hair and I've tried to give it a bit of a careless wind swept look bypulling some other curls over the top and things, you can of course do it more stylised, or if you want to take attention away from the back of your hair you could put in a nice butterfly clip or a heavily decorated one!
And here's the finished look with me smiling and it's pretty ne! I love this hairstyle and I hope you'll enjoy trying it out!!!!! Hee Hee! Good luck with it!!!!


 Full lacey chiffon and everything! The gauze has a kinda irredecance to it that makes it looks all soft and lovely and it has these lovely floaty see through shoulders that look so feather light, not only this but the shape of the dress is so nice the way it flares out at the bottom a little!!! Over all for a tenner a very very great find! Not only this but you should see the detailinground the neck line!


